DATABENDING TUTORIAL > > >
[ORIGINALLY POSTED TO TUMBLR -- 6/19/2022]


Databending is something I adore unabashedly. It’s an amazing technique to use whenever you wanna make some Crazy Stuff. I personally use Audacity to databend; this is a pretty common method, but I made a mini-tutorial about it anyway, because it’s FUN. And because the process is actually really simple!


STEP 1. PREPARE YOUR IMAGE!


Your image has to be in an uncompressed image format such as .bmp or .tif, because compressed image formats (such as .png or jpg) are generally too volatile to work with due to the nature of their data.

Here’s the image I’ll be imploding for this demonstration. I chose it because it was like the first file in my pictures folder, and because it’s a good image.

I opened it in MS Paint, saved it as a 24-bit Bitmap, and named it FREAK.bmp, because that’s what it is.


(Look at this FREAK.)


(U-Law for encoding, and Big-endian for byte order.)


(Seriously, don't play this!)

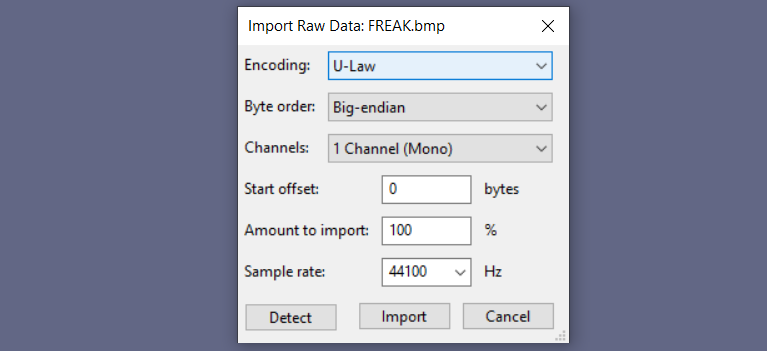
STEP 2. IMPORT YOUR IMAGE!

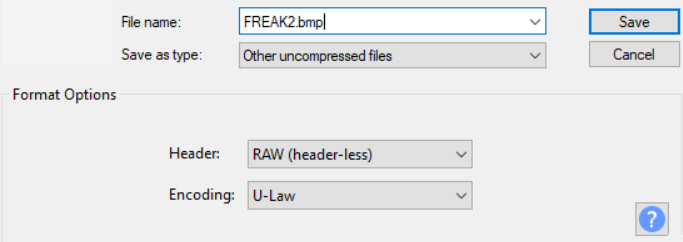
In Audacity, go to File > Import > Raw Data. Open the image you prepared, and use the settings shown to import it. You’ll get this image as raw audio data, which I recommend you do NOT play. It will be very loud and abrasive, so probably keep your volume down in case you accidentally play it.


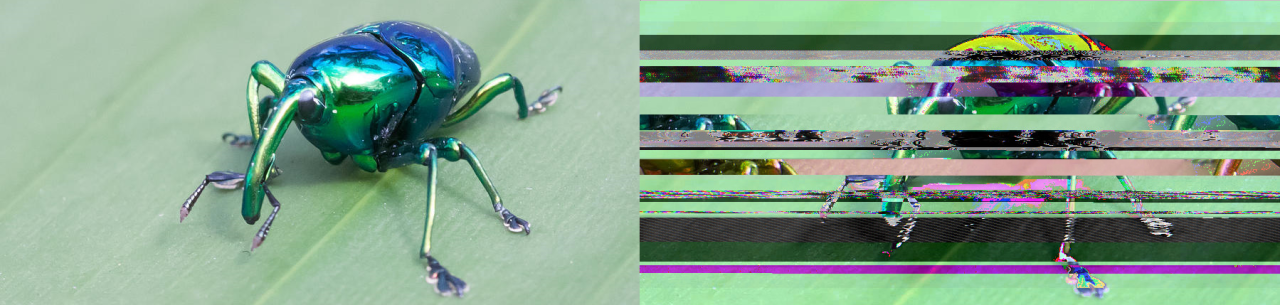
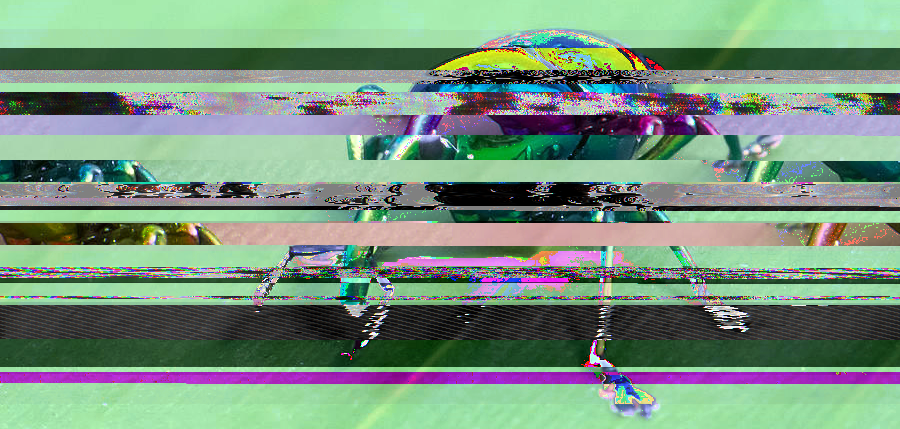
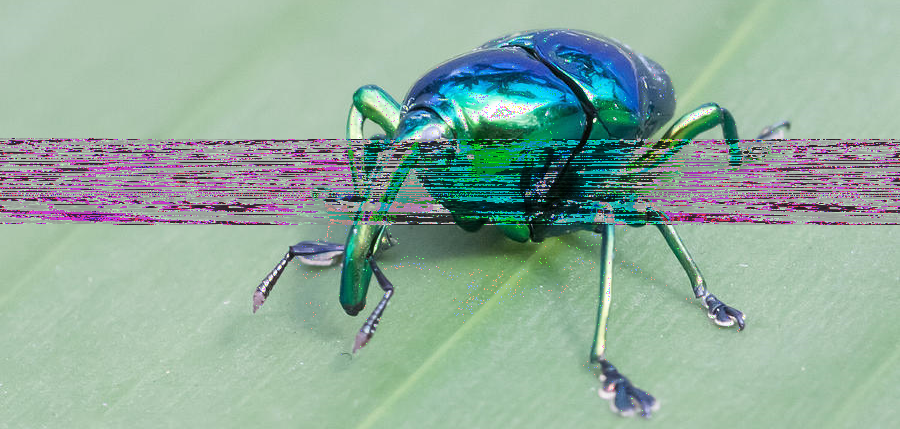
STEP 3. BEND THE DATA!

You can use basically anything in Audacity’s effects menu for good results, though I tend to favor Bass and Treble, Echo, Invert, dblue Crusher, and dblue Glitch. You can also copy and paste portions of the audio data in different places, and even import other audio to play alongside the data.

Try not to edit the very beginning or very end of the audio, as this might end up corrupting the image header, and it won’t be readable as an image anymore. Don’t shy too far from them, though; if you avoid them too much, the top and bottom areas of the image will remain unchanged. The positioning of the audio data is surprisingly straightforward, so with enough practice, you can approximate what portion you’ll be editing with relative ease.

This is definitely the longest part of the process, since it can take a lot of trial and error for good results. At the start, I recommend doing little portions at a time to get a sense of what exactly your edits are affecting. Try a lot of different things, and remember that Audacity lets you undo things easily and infinitely!


STEP 4. EXPORT YOUR IMAGE!

Once your audio is sufficiently screwed, go to File > Export > Export Audio. Use these settings to export it:

Make sure to replace .raw with .bmp, or whatever image format you used.


(FREAK2, the sequel to FREAK.)


(FREAK.bmp, sufficiently freaked up.)


STEP 5. ENJOY YOUR IMAGE!

And here’s what I ended up with!

For the record, I messed with the audio a LOT here. You can get much more subtle results—or much more severe—depending on how much or how little you alter, or how you alter it.


Here’s another databent picture, which I made by putting a 3 second clip of “Kiss Me Thru the Phone” over the image data.

It’s so interesting seeing a song be reduced to something so arbitrary in an image format. It’s equally interesting seeing something as arbitrary as audio waveforms becoming a semi-coherent image, ignoring the Soulja Boy-induced scar in the center. It always makes you wonder how it works. If you sang at just the right pitch, could it became a photo of a sunset? What if it became a portrait of someone you’ve never seen before, or someone that doesn’t exist at all?

That’s obviously impossible, but there’s this strange sense of wonder about it anyway. It still seems plausible, because the data that constitutes an image is generated in such a way that there exist infinite, arbitrary combinations—combinations which might just be coherent to us, if a billion different binary stars align.


(Corrupted by “Kiss Me Thru the Phone”.)

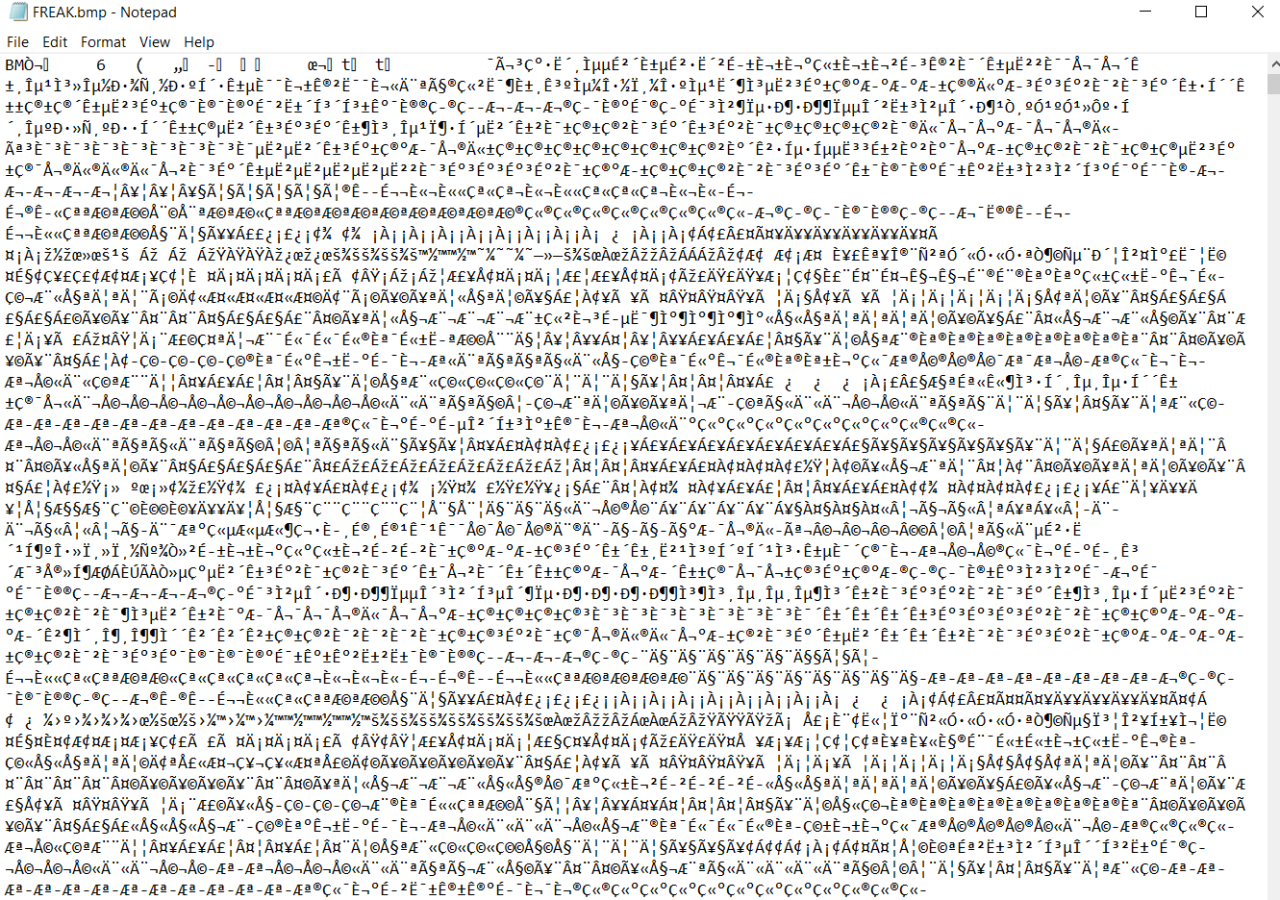
(FREAK.bmp, visualized via plaintext rather than audio data.)

The way this data is stored isn’t arbitrary at all though, even if it looks that way to us. Audacity’s audio waveforms are only one way to visualize this raw data.

Computers just seem so magical sometimes. The raw data is incomprehensible to our eyes, but they can read it for us and transmit exactly what they see. As long as you keep the proper headers in place, it’ll still read this data as a picture, as perceivable pixels, no matter how nonsensical it otherwise looks to a human.

It’s interesting to think about databending in terms of glitches. The results are often very similar to glitches that might organically manifest, but the process is entirely intentional. It usually takes some effort and intent to get a “good” result from databending, but glitches and corruption are entirely void of human intent. They just happen, arbitrarily, for any number of reasons.

If something’s just a little out of place, you might get a huge, jarring stripe slashed across the image’s center—or you might break the image entirely, if it’s out of place a little too far to the left. You’d never be able to tell the difference yourself, but a computer certainly can.


But to a computer…


… these images might as well be identical.